First, I’ll show you how to record audio directly from your speaker output with a graphical user interface (GUI). Then I’ll show you how to do it from the command line. And finally I’ll show you how to put those commands into a script and set a keyboard shortcut to it. Ready?
Recording Audio Directly from Speaker Output Using Audacity
Audacity is a graphical tool for manipulating and recording audio files.
Audacity will not by default give you an option to record audio directly from your speaker output. To get this working, we’re going to use another application called pavucontrol (PulseAudio Volume Control).
Once you have them installed, launch both of these applications from the applications menu. Or you can open them from the command line with the following command.
Now play an audio file or a video, just to get some sound pumping through your speakers for this test.
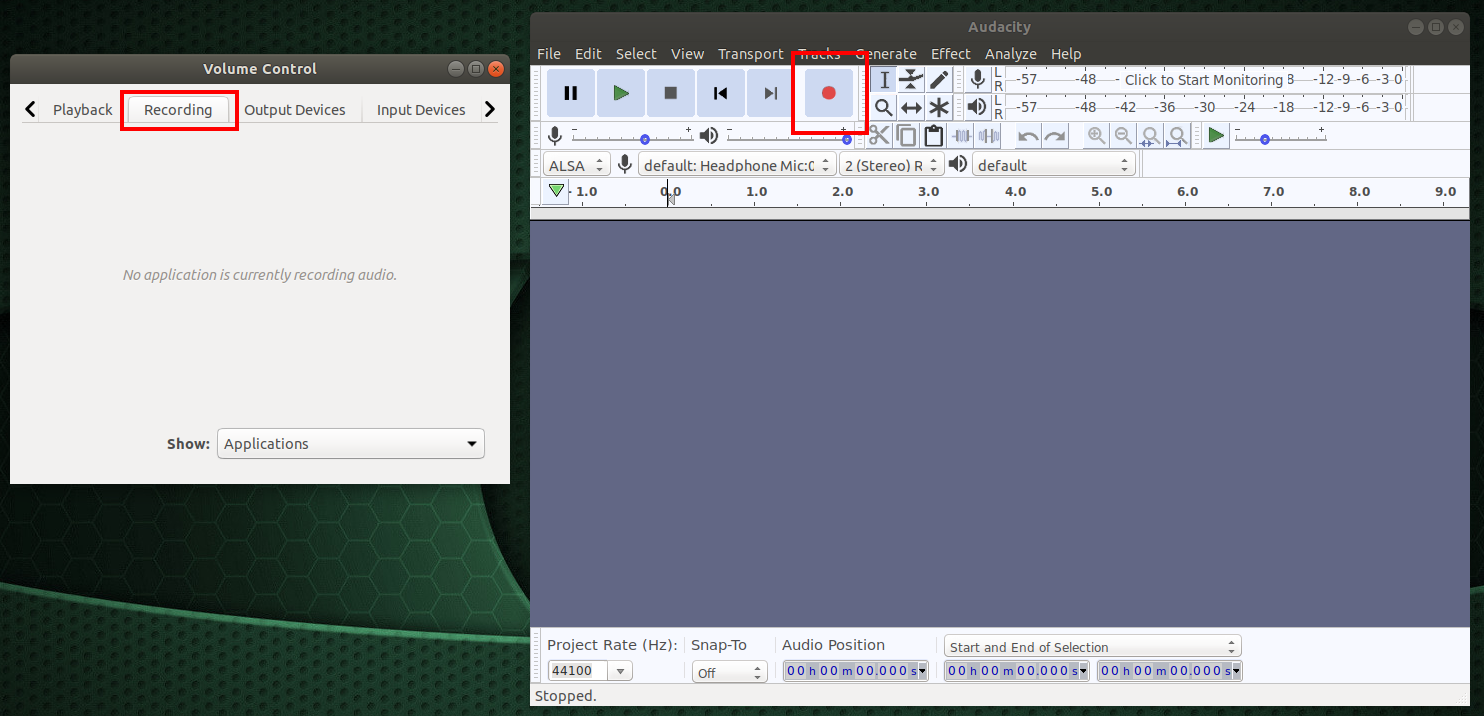
Click on the Recording tab in the Volume Control app. Then press the record button in Audacity.

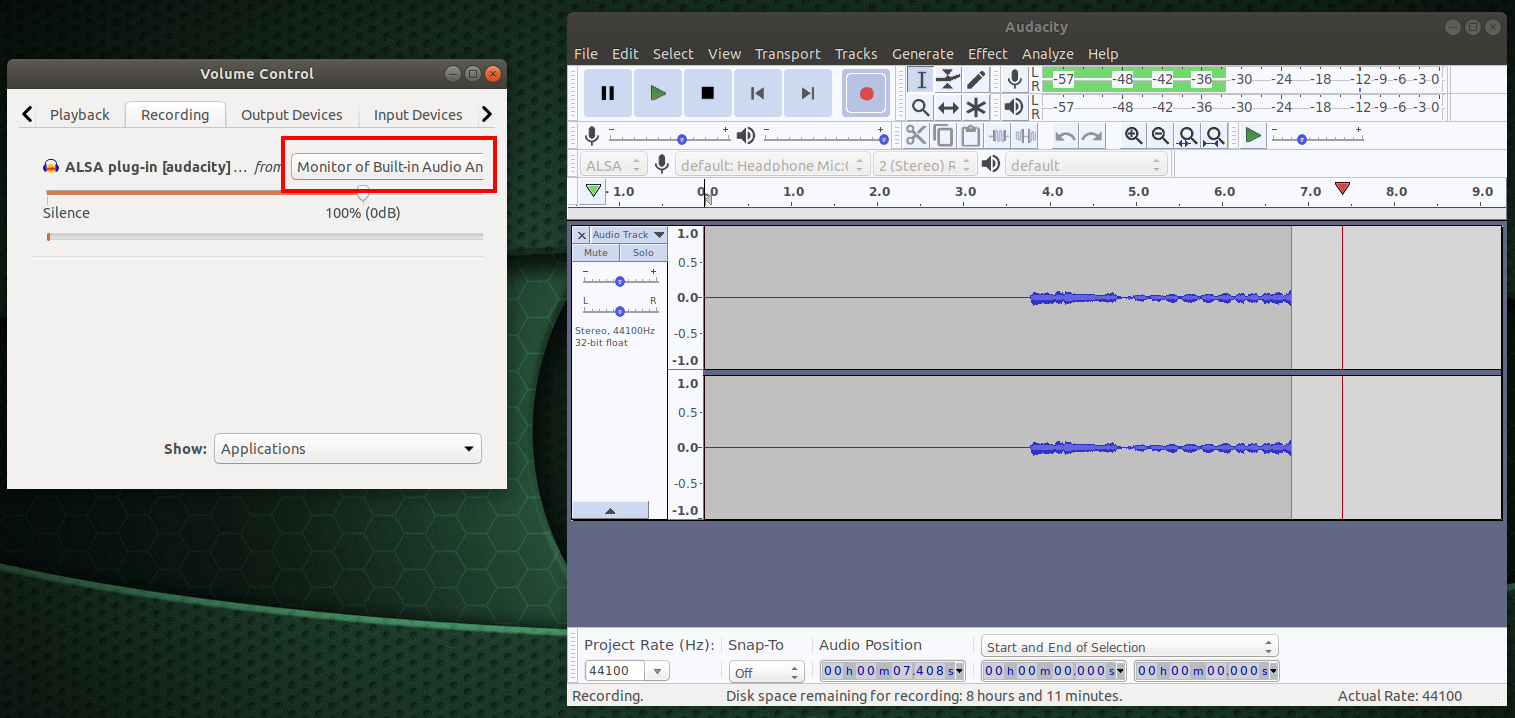
At first you will notice that Audacity is not recording from your speakers. Click on the dropdown box for the plugin in the Volume Control app and select the option that starts with Monitor.
You will see where the sound begins to come through.

That’s it. Audacity will retain this setting until you change it, even after it closes. When you are done recording, just export to .mp3 or whatever file type you choose.
Recording Audio Directly from Speaker Output Using Commands
Figuring out the speaker output name is the first step.
For me, this returns the following. Yours may be different.
  * index: 0
	name: <alsa_output.pci-0000_00_1f.3.analog-stereo>
		analog-output-speaker: Speakers (priority 10000, latency offset 0 usec, available: unknown)
Insert the speaker output name (followed by .monitor) into the command below. Update /home/sudofry/Desktop/myrecording.mp3 with your desired path. You can press CTRL + c at any time to stop this recording.
And for my final trick…
Recording Audio Directly from Speaker Output Using a Keyboard Shortcut
Create a bash script and paste the following into it. Don’t forget to make the script executable. If you don’t know how to create a bash script, check out this tutorial. -> Bash Scripting Basics
#!/bin/bash

record_audio()
{
    filename=$(date +%m-%d-%Y-%T)
    directory="$HOME/Desktop/"
    speaker="alsa_output.pci-0000_00_1f.3.analog-stereo"

    notify-send "Recording started"
    exec parec -d "$speaker".monitor | lame -r -V0 - "$directory""$filename".mp3
}

main()
{
    if pgrep "parec"
    then
        pkill "parec" && notify-send "Recording stopped"
    else
        record_audio
    fi
}

main "$@"
The filename variable is set to the current date and time, which will then become the name of your .mp3 file. The directory variable is set to save the file to your Desktop. $HOME takes the place of /home/sudofry. The speaker variable should be set to your speaker output name.
Open your Settings application and click on Devices -> Keyboard and scroll to the bottom to create a keyboard shortcut. Set the path to your script as the command and set up your desired keyboard combo.
And you’re all set. When you press your new keyboard combo, a notification will appear to let you know the recording has started. When you press the keyboard combo again, a notification will appear to let you know that the recording has stopped.


